

During our passage from Martinique Erica found one day a lot of thin line on deck close to the mast. It was rapidly recognised as part of the leech line system on the main sail. The leech line enables the aft edge of the sail to be held taut in strong winds, typically when the wind is forward of the beam. When the line is missing or loose the edge of the sail flutters noisily and eventually will fray the fabric, certainly not something we want to happen to Temptress’ relatively new main. Whilst the wind was mostly behind us it was fine but as we approached Panama the wind turned more northerly and the leech began to flutter so down came the sail and we continued on the jib alone which was fine as there was plenty of wind so we hardly noticed any reduction in speed.
Soon after arriving in Shelter Bay it was time to examine the problem and hopefully fix it. First let me describe how North Sails set the leechline up. Normally the line runs down the aft edge of the sail from the top to the bottom and at each reef point there is a cleat to fasten the line so it can be adjusted regardless of the sail size.
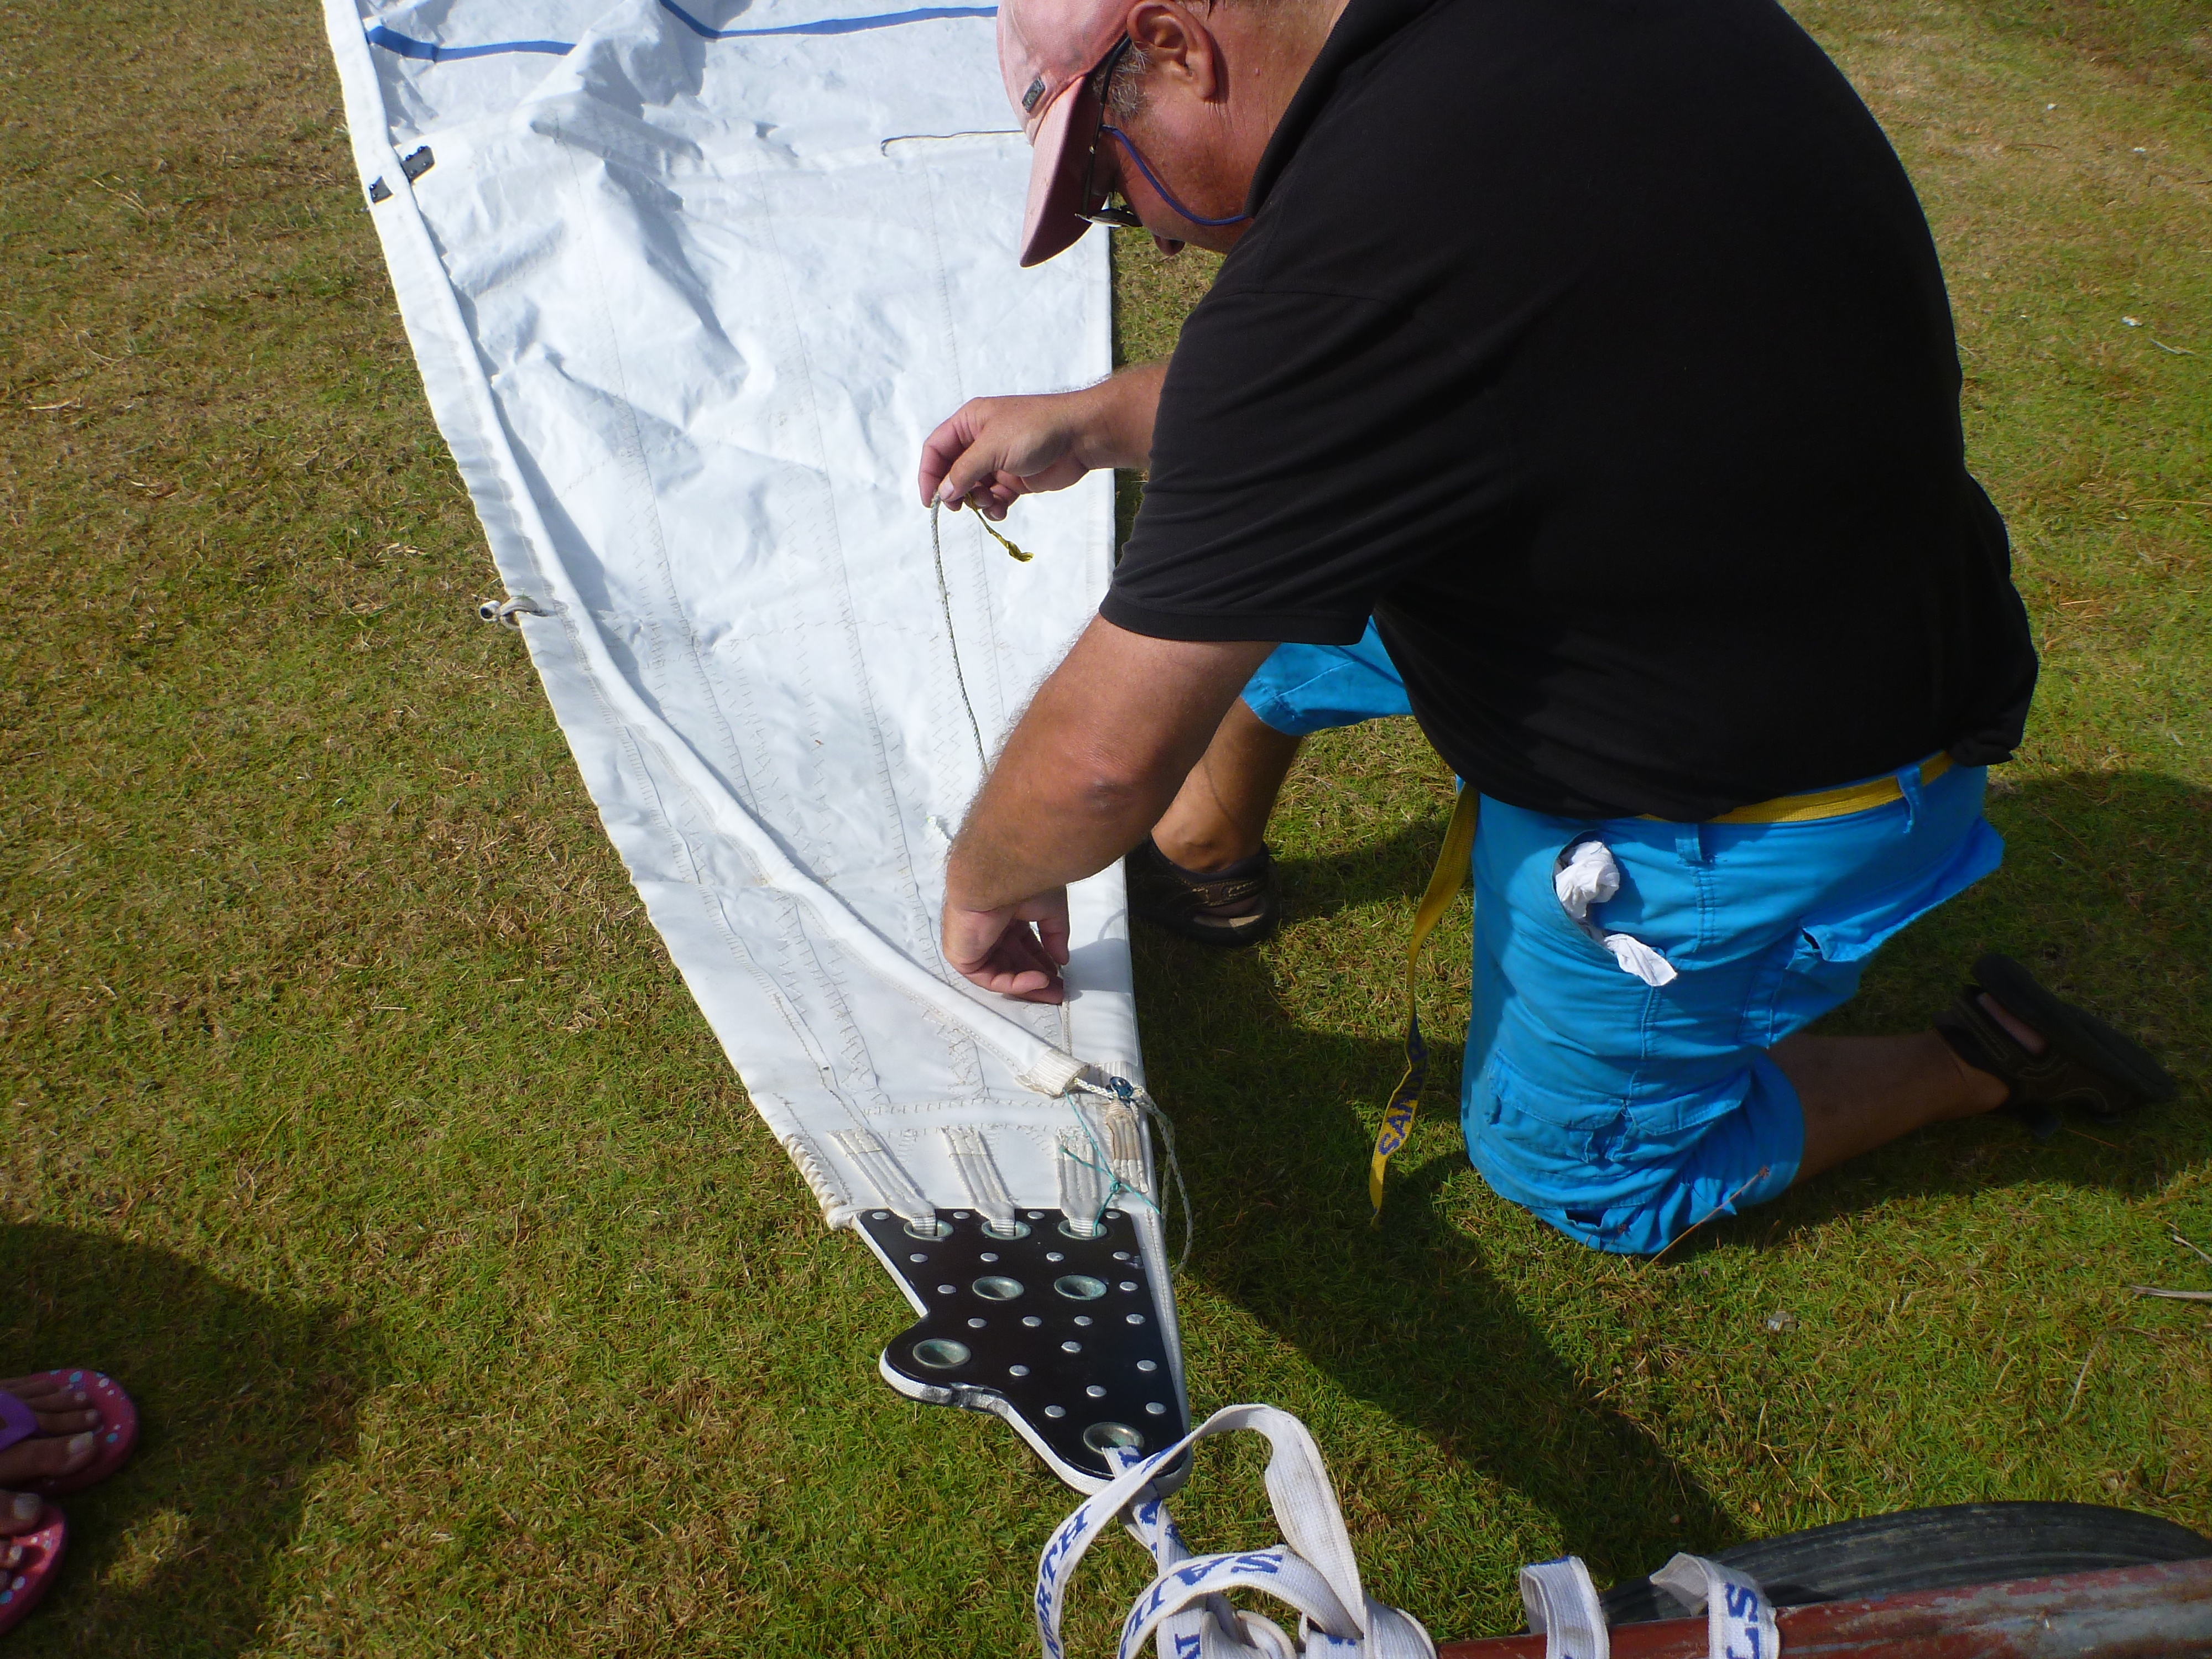
However on some boats and Temptress is one, the boom is high and once the sail is reefed reaching over the pile of sail on the boom to the next cleat involves balancing precariously on a winch, often whilst the boat is heeled over ploughing through big seas. Not safe or seaman like. Instead the leech line on our main goes up from the bottom aft corner through a tube at the aft edge to the top of the sail where it passes through a small pulley attached to the head of the sail then down the forward ie mast edge or luff of the sail towards the boom. Again at intervals on this edge the leech line passes through cleats so it can be adjusted as required whatever the state of the sail.
From our inspection the line appeared to have chaffed through right at the top of the leech then unthreaded itself down to the lowest reef point. First we had to take the battens out as with them in the whole is unwieldy as they stiffen the sail front to back parallel with the boom. Once that was done we could then take some of the sail off the mast. Working on deck and using an old batten as a bodkin the line was fed back through the tube at the front of the sail to the pulley.
Where was the other end? We felt the top of the leech area, it seemed there was a metal eye or similar at the top of the line coming up the leech of the sail and there still appeared to be some line above it. In trepidation (our mainsail cost more than a Dior dress, what if I couldn’t re-stitch it?) I unstitched a couple of three inch lengths of the leech area so we could peer inside. There we found a piece of line stitched at the top that had a frayed end matching the line we had rethreaded. Below it was the line coming up the leech which ended round a metal loop or to give it its mariner’s term a thimble. Somehow we’d have to join the two ends and possibly graft in a length of line to make up for the frayed part. And though he line had been rethreaded the stiff dacron sail was all bunched up. The upshot was we realised that the entire sail would have to come off as the easiest place to do this work would be on the grass beyond the marina buildings.
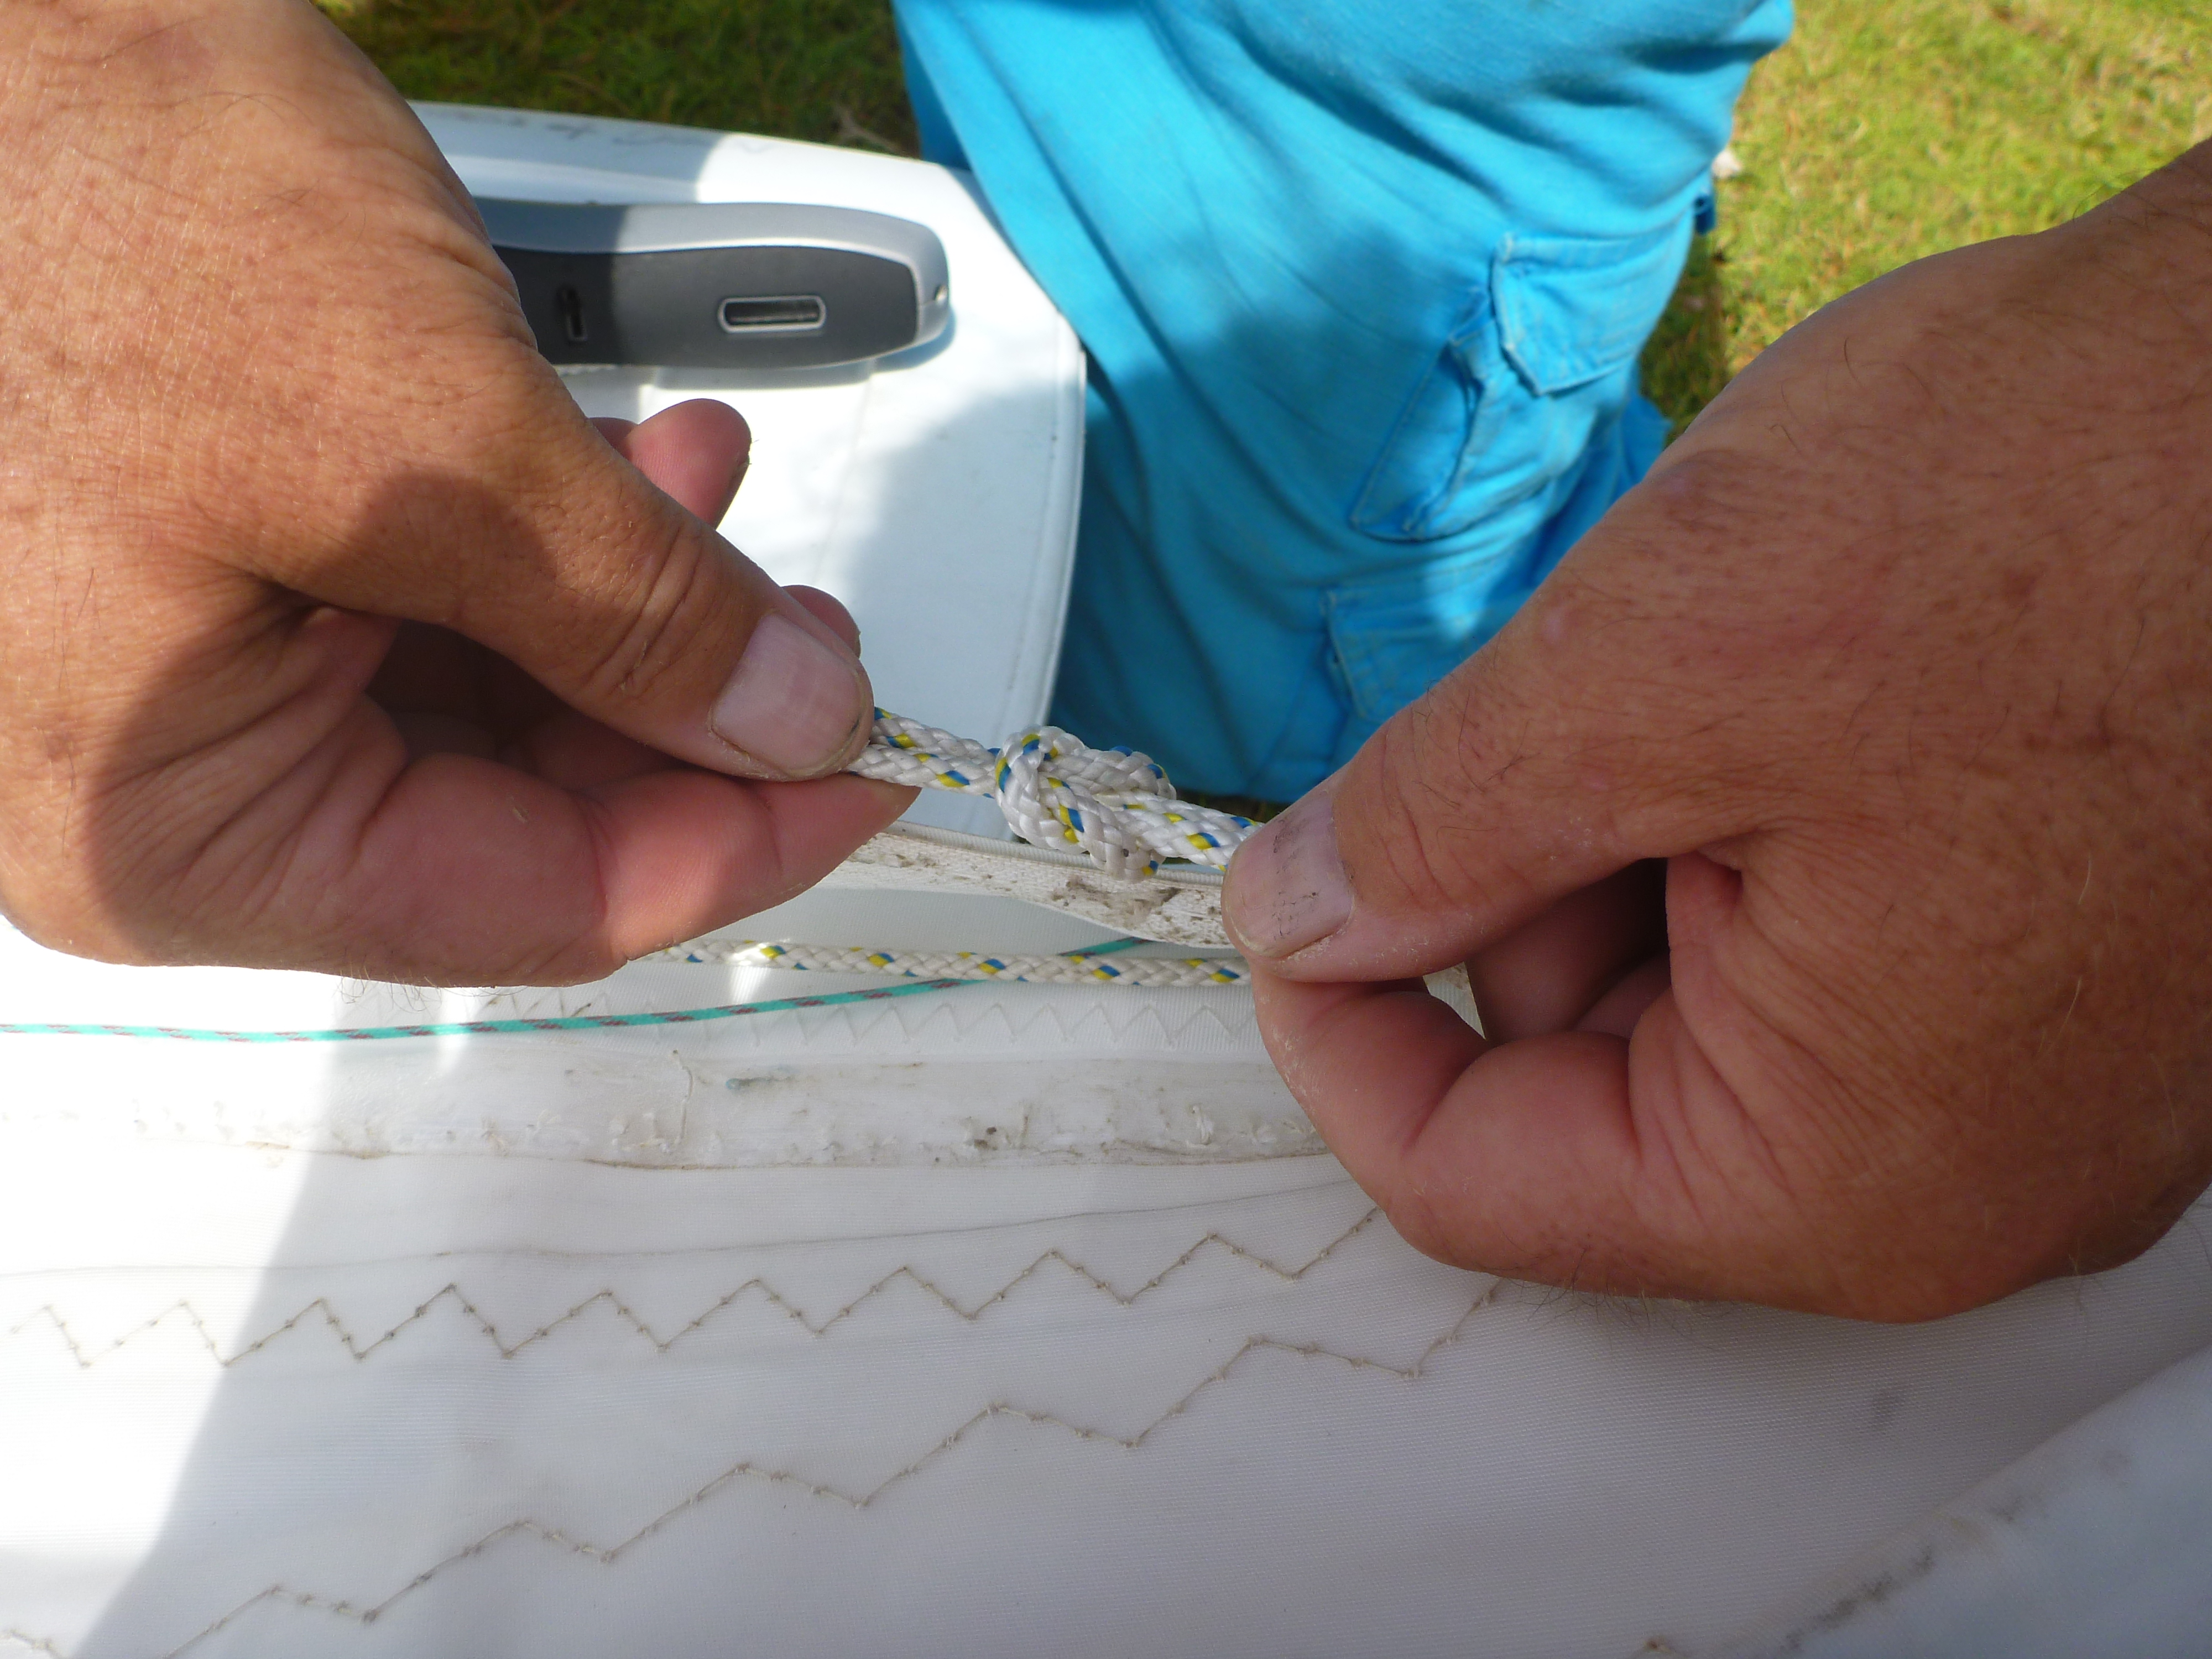
Once the sail was spread out the whole of the top of the leech line covering was unstitched and the very tacky glue wrenched apart (everyone and everything became sticky). One short length of the boat washing line and a couple of reef knots later the repair seemed to be on course. Reef knots were chosen as being the flattest knot using the least line practicable so would move through the tube in use, however they are not renowned for staying together when there is no tension on the ends as would sometimes be the case so using waxed thread I stitched the ends down. This would also avoid the ends bending over and getting jammed.
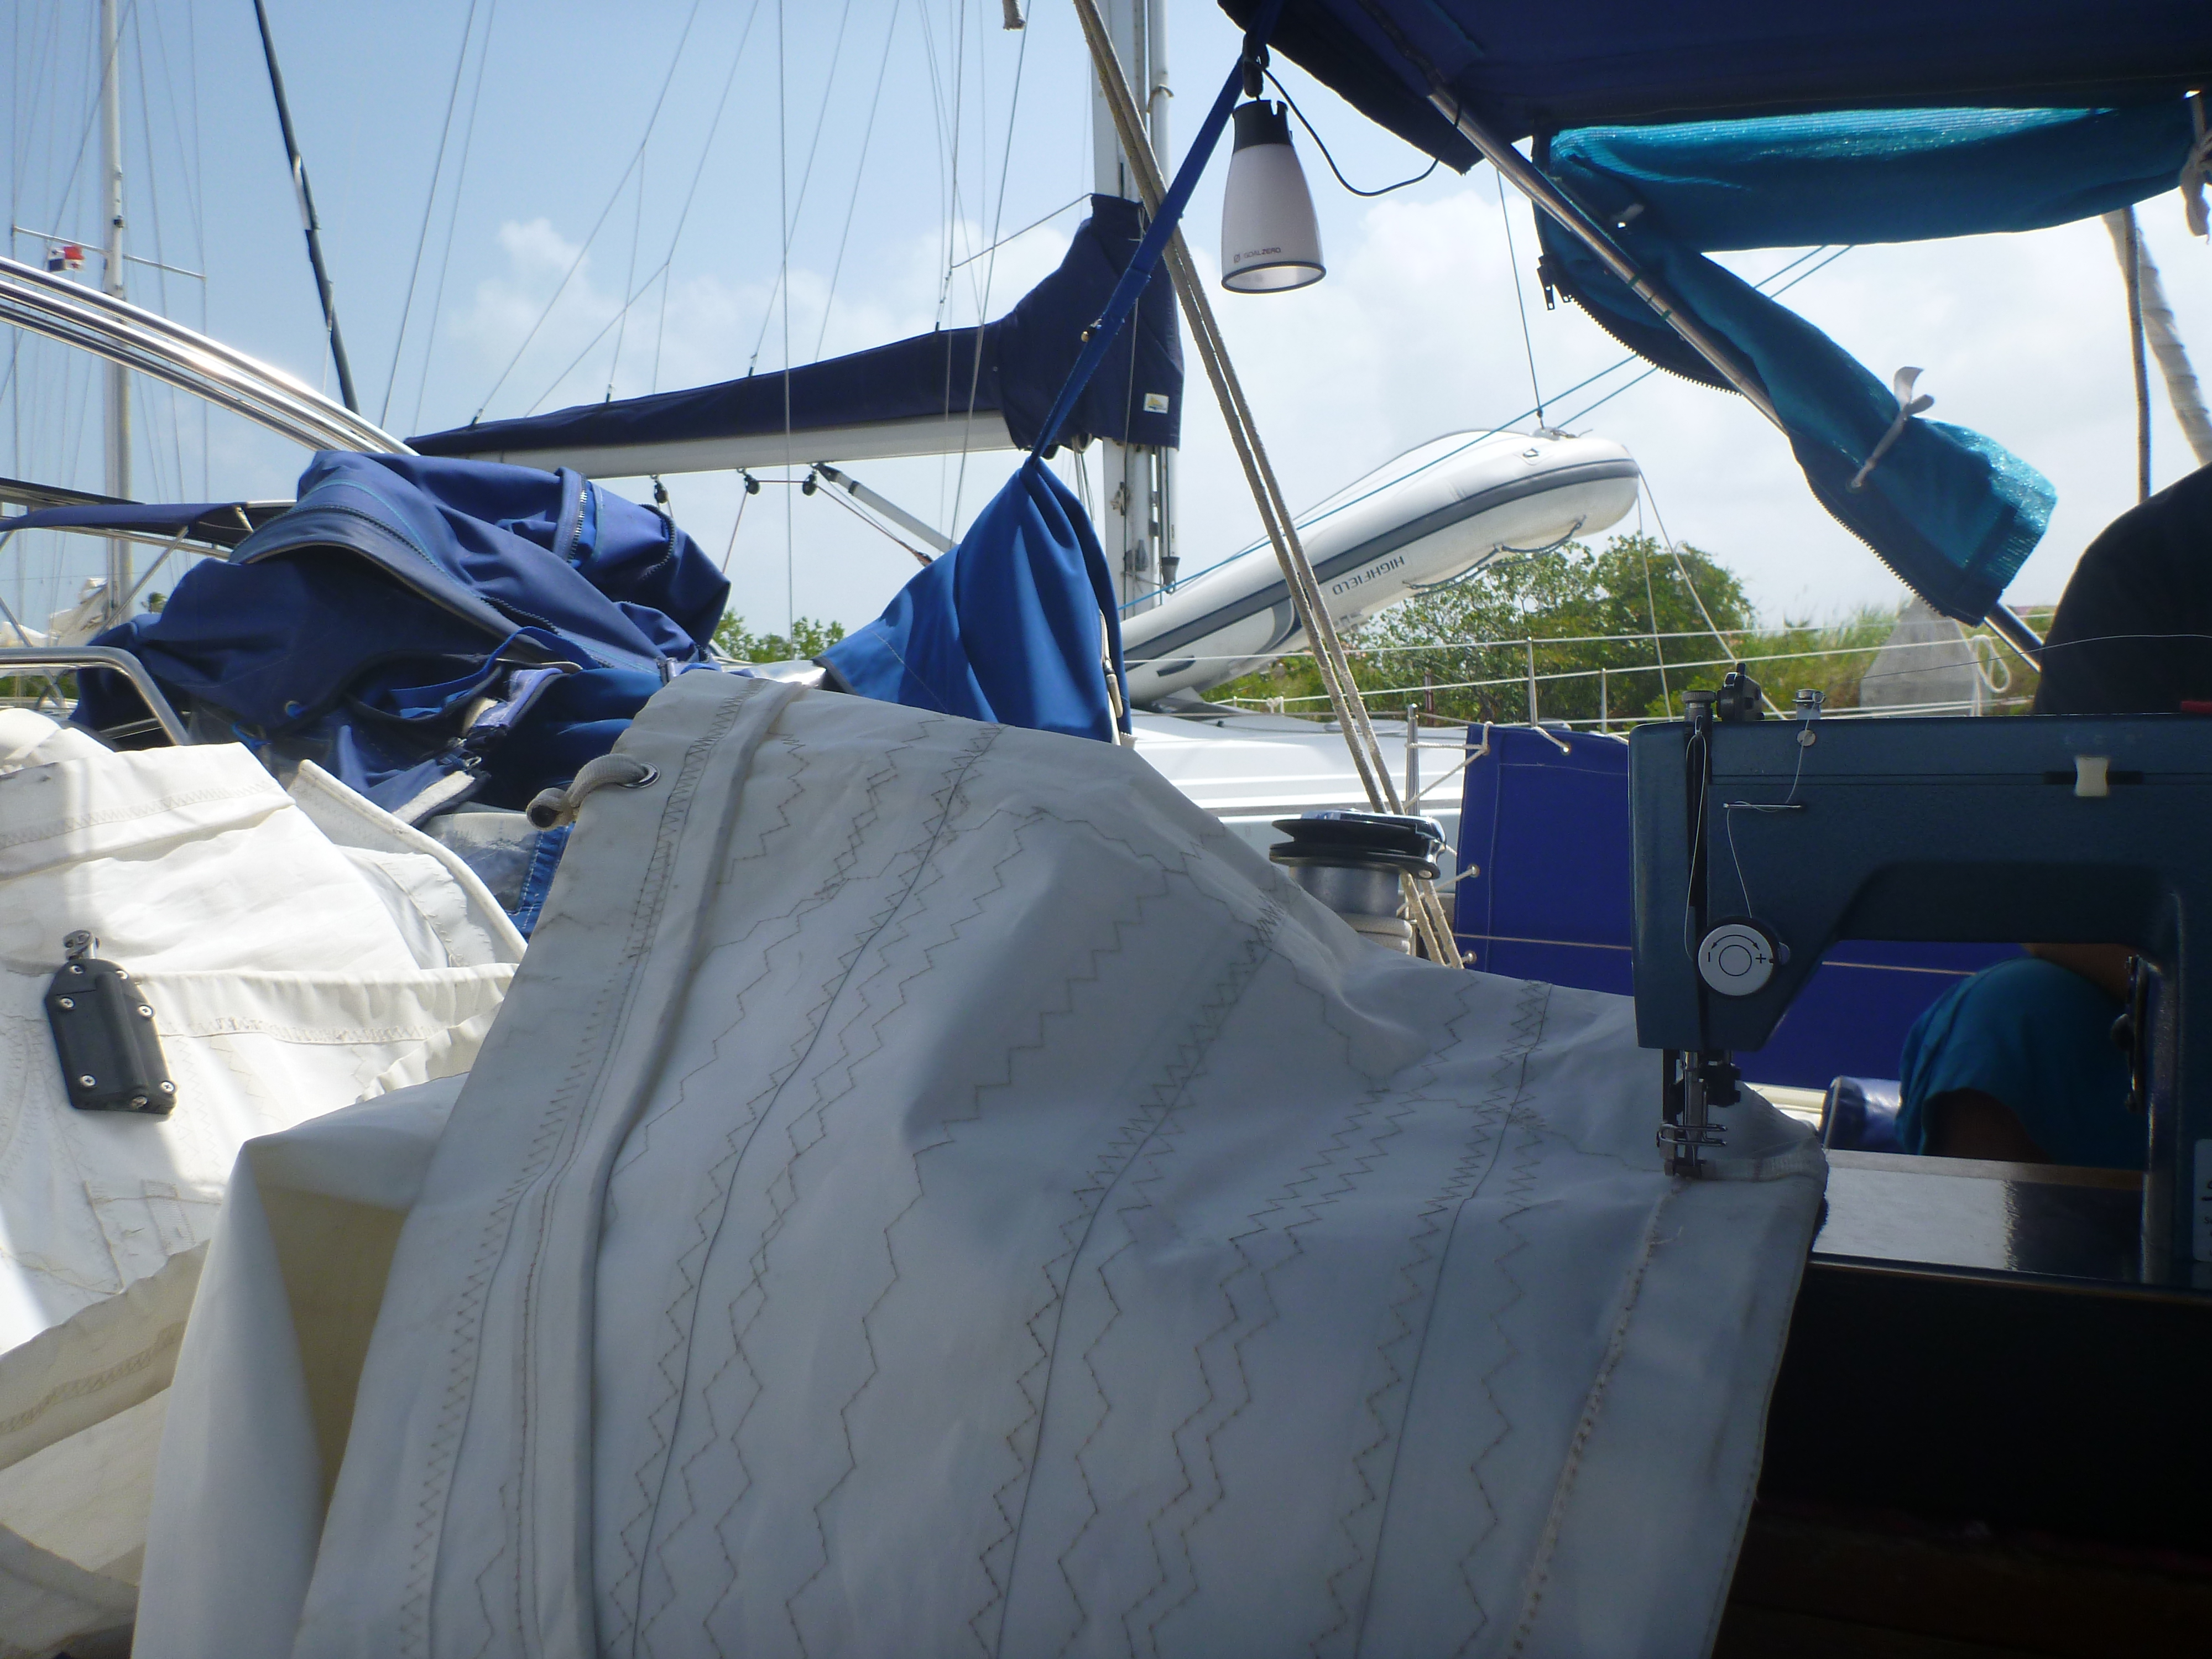
The whole sail was then rolled up and transported back to the boat for the final sewing by trolley (it is too heavy and awkward to carry. I set up my sailrite sewing machine in the cockpit and Kevin & Erica manoeuvred the top of the sail so it was by the machine. Two rows of rather wobbly stitching and the repair was complete and whilst the machine was out at it I restitched a corner of a window in the sprayhood where the stitching had succumbed to UV. I felt relieved and pleased that our first major sail problem since leaving the UK could be repaired without resorting to sail loft – self-sufficiency at its finest! And I am more than a little chuffed I managed the sewing part, though there were moments when I wondered whether it was wise to unpick otherwise strong stitching on such a vital and expensive item.


Only my mother would have a sewing machine to hand whilst sailing the world. Lol love you Mum. Loved this blog entry. Sharing it round my friends. Xxx
LikeLike